

Introduction
In the system, you often work with tables containing date information. Sometimes, you may need to view records represented in a calendar format, sorted by date, and divided by days. The standard view, which displays records one by one in a list, may not provide the best user experience.
Let us explore how to leverage this powerful feature.
Benefits of the Calendar Control
- Flexible Filtering and Views: Appling filters to display records from different perspectives and dimensions, allowing for a comprehensive view of the information.
- Intuitive Date Selection and Browsing: Quickly select and explore dates on the calendar, navigate across different time frames, and highlight important events.
- Efficient Activity Planning: Conveniently plan and manage meetings, appointments, tasks, and follow-ups within the calendar interface, ensuring seamless organization and coordination.
- Drag-and-Drop Functionality: Easily reschedule or modify event schedules by dragging activities from one day to another.
- Detailed Activity Management: View and update specific details about an activity directly within the calendar.
- Reminders: Create reminders for scheduled activities, ensuring important tasks are never overlooked.
- Color-Coding Options: Assign different colors to records based on type, priority, or custom criteria, improving visual organization.
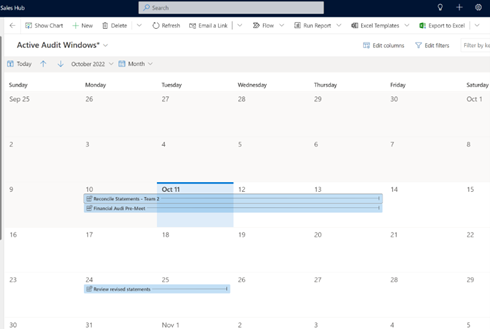
What You Will Get in The End
Prerequisites
Before proceeding with the tutorial, ensure you meet the following requirements:
- In the Microsoft Dynamics 365 Business Applications (Sales/Marketing/Field Service/Project Operations) or Microsoft PowerApps Model-Driven Apps, one of these products should be used. This functionality is available specifically within these applications.
- The table where the Calendar Control V2 will be applied must be created as an activity table, enabling proper representation.
Let us Add Calendar Control in Microsoft Dynamics 365 Step-by-step
Step 1: Accessing the App Settings and Customizations
- Launch your Microsoft Dynamics 365 application and log in to your account.
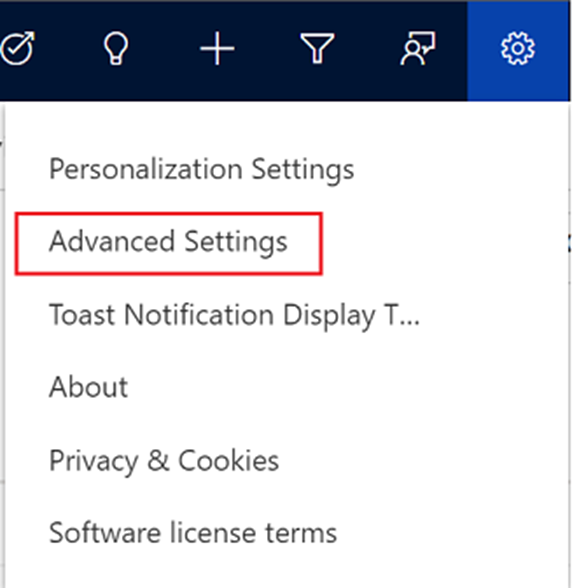
- Select the Settings icon and click "Advanced Settings" to access the app's configuration options.
- Alternatively, you can navigate to Settings > Customization > Customizations or choose the appropriate Solution if you are working within one.
Step 2: Configuring the Calendar Control
- Select "Customize the System" in the Customizations window or navigate to the Solutions tab.
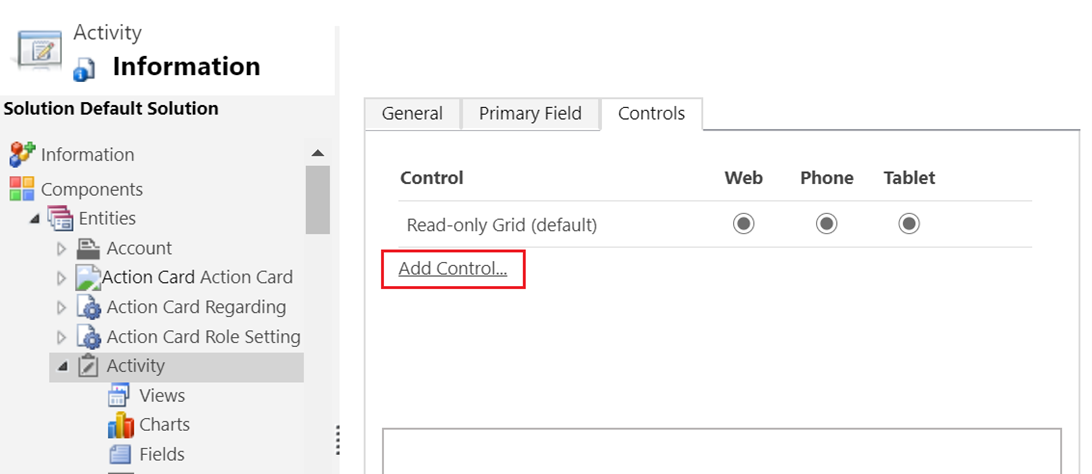
- Expand the Components section in the solution explorer and locate (open/select) the relevant table (e.g., Activity).
- Click "Add Control" to open the Add Control dialog box in the Controls tab.
4. Choose "Calendar Control V2" from the available options and click "Add."
Step 3: Customizing the Calendar View
- The Calendar Control is now added to the list of controls for the selected table.
- By default, a read-only grid is displayed when users access the table. To make the calendar view the default, select the corresponding Calendar Control V2 option.
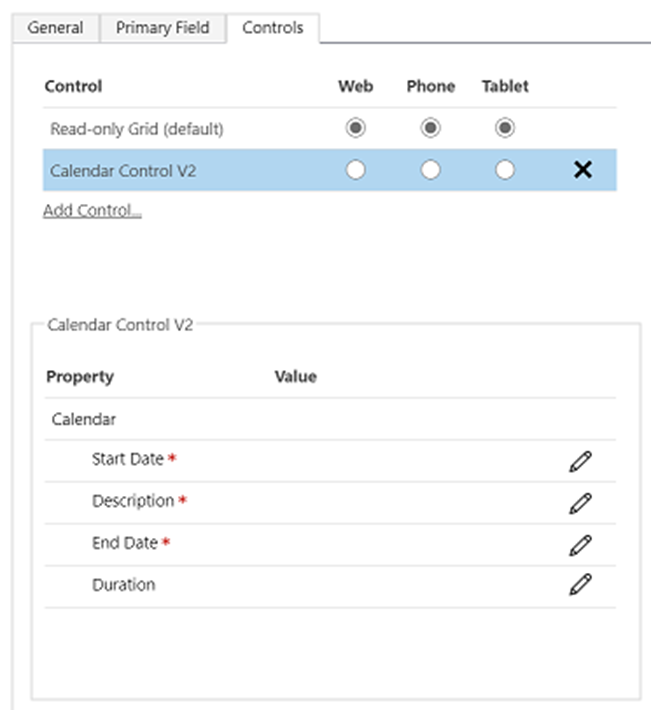
3. To configure the columns displayed within the Calendar Control, select the edit icon for each mandatory column and choose the appropriate binding values.
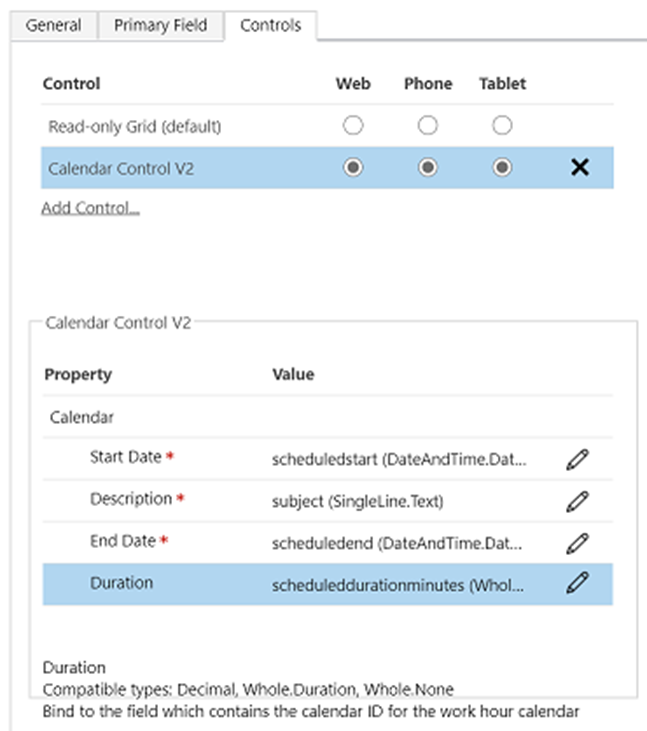
4. Once you have made the necessary changes, click "Save" to save your modifications.
Step 4: Publishing the Changes
- To make the configured Calendar Control available to all users, select "Publish" within the customization interface.
- Dynamics 365 will process the changes, and upon completion, you can close the customization window.
Step 5: Testing the Calendar Control
- Return to the Dynamics 365 main interface and navigate to the desired record or entity form.
- Locate the area where you added the calendar control and verify it is displayed correctly.
- Interact with the calendar control by adding, modifying, or deleting events and appointments.
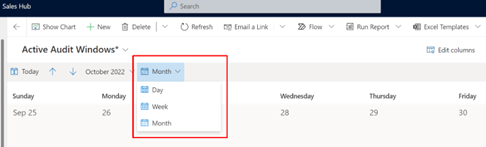
- Explore the views and functionalities available, such as day, week, month, or agenda view.
Conclusion
Congratulations! You have successfully enhanced your Microsoft Dynamics 365 experience by adding Calendar Control. Now you can enjoy a more intuitive and visually appealing representation of your records, allowing for efficient date-based management and organization. Remember to explore additional customization options within Dynamics 365 to tailor the Calendar Control to your specific business needs. Stay tuned for more tutorials!